
Student records, ready in the app
Link each student's Slate profile to their Guidebook account, then show Slate data on their in-app profile and track their event registrations.



Linking student records is what lets Guidebook recognize each student.
Once a student's Slate profile is linked to their app account, their Slate details can show on their profile, and their Slate event registrations can be tracked in Guidebook.
What comes over from Slate
The Slate fields available to sync. Standard fields come with the Guidebook Person Suitcase, and four custom fields come with a second Suitcase.
What it looks like
Slate details on the student's profile in your app, and a connection in Builder that tests itself.
In the app
College, major, and orientation group appear on the student's profile.

In Builder
The connection tests itself as soon as you paste the web service URL.
After you save
The first sync runs right away, then on the cadence you set.
How each student gets linked
Guidebook links each app account to the right Slate profile in one of two ways.
Setting it up
Your Slate admin prepares Slate, then a Builder organization admin connects it.
Your Slate admin Imports the Suitcases, builds the query web service, creates the access token
Follow these steps in order to set up the Person integration in Slate. You’ll finish with a web service URL and security key, which you’ll need to complete setup in Builder.
-
Import the Guidebook Base Person Suitcase via Database > “Suitcase Import”.
Enter Suitcase ID:
df2da26c-76ad-4a7b-9296-3131eaedfc74:gdb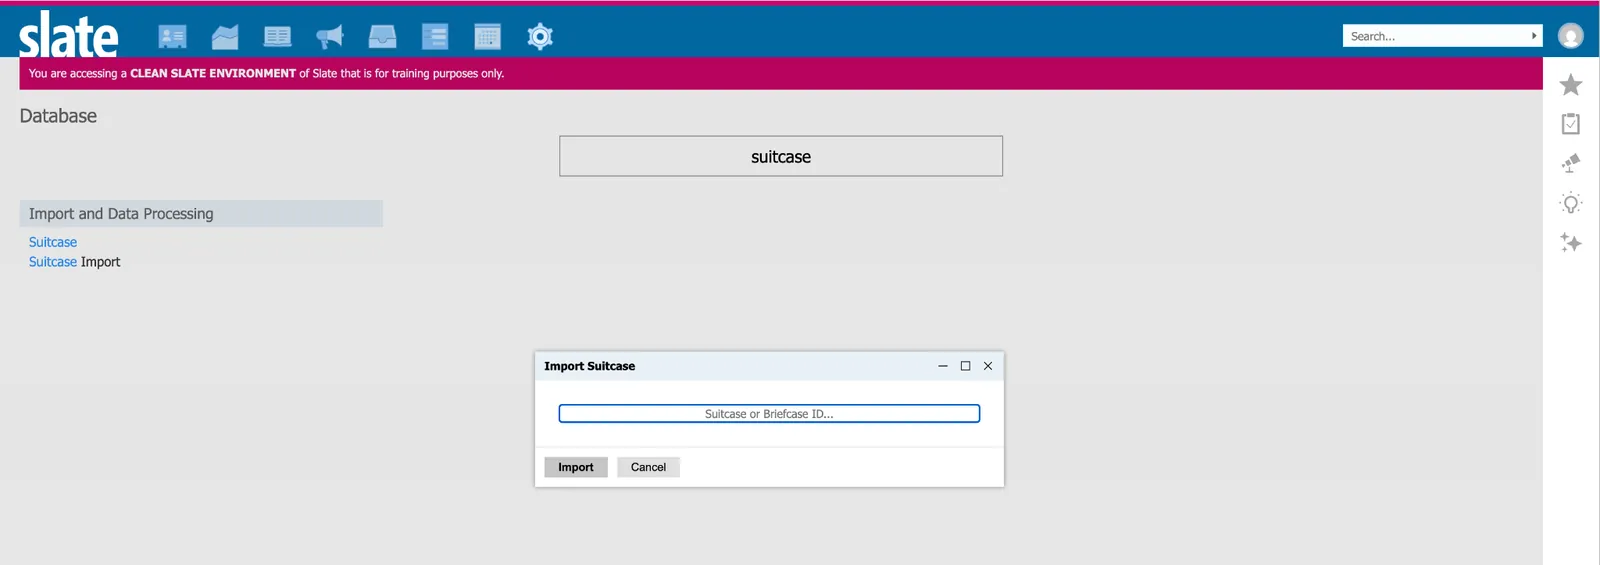
-
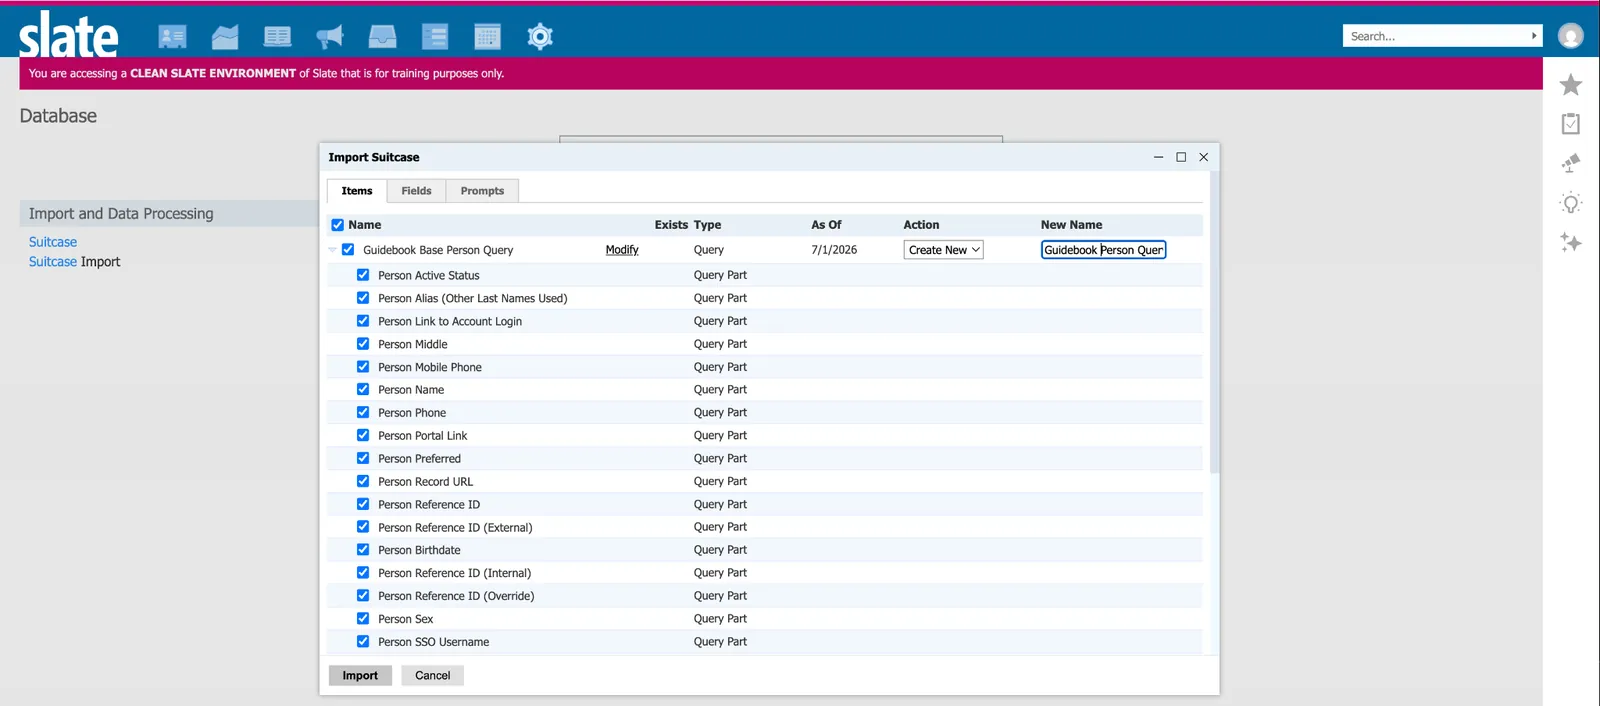
Select “Import” and set the New Name to “Guidebook Person Query”.
Note: You can de-select any fields you don’t want to provide to Guidebook at this point. For best results, we recommend importing the full set of fields.
-
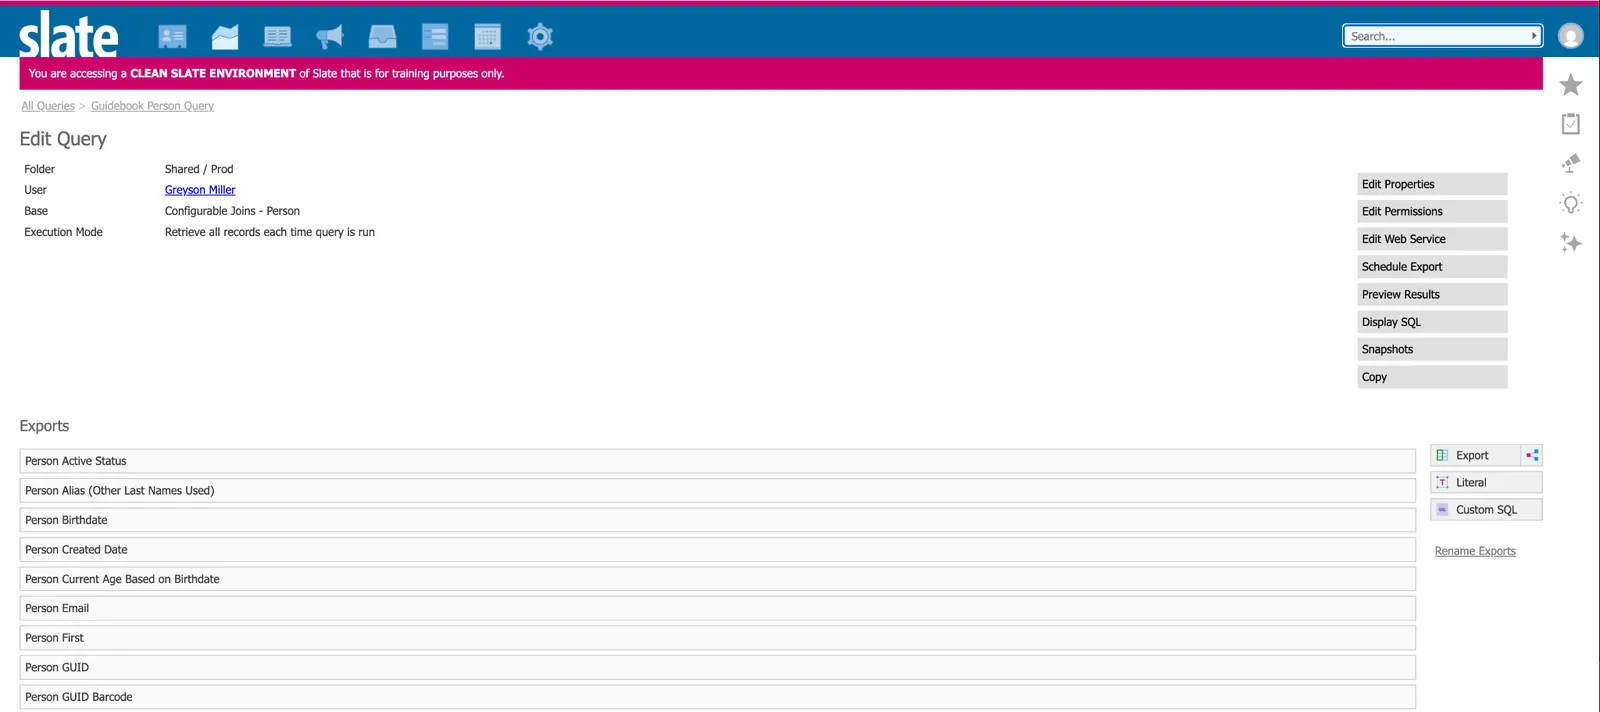
Validate the import by selecting “Edit Query”. Confirm that fields are populated in the “Exports” section.
-
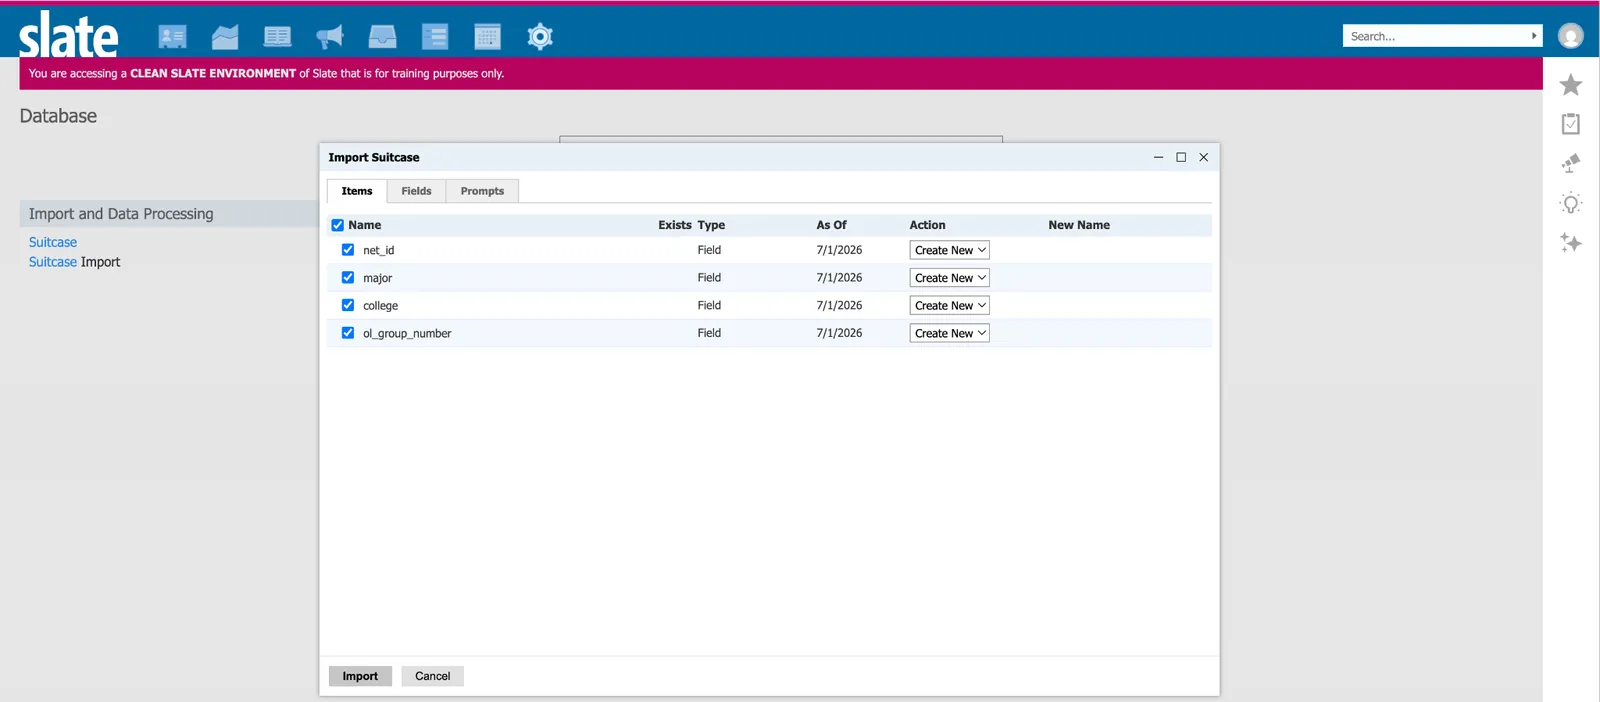
Import the Custom Fields the integration needs to function: NetID, Major, College and OLGroup.
The default Custom Fields Suitcase ID is:
53daf0d6-376a-4c18-b9ec-fe13f1d1333f:gdbFollow the same import process from steps 1–2, then verify the result appears as shown.
-
Refresh the Configurable Joins Library by searching “Refresh Configurable Joins Library” and pressing “OK”.
This surfaces the new Custom Fields for Export in the next step.

-
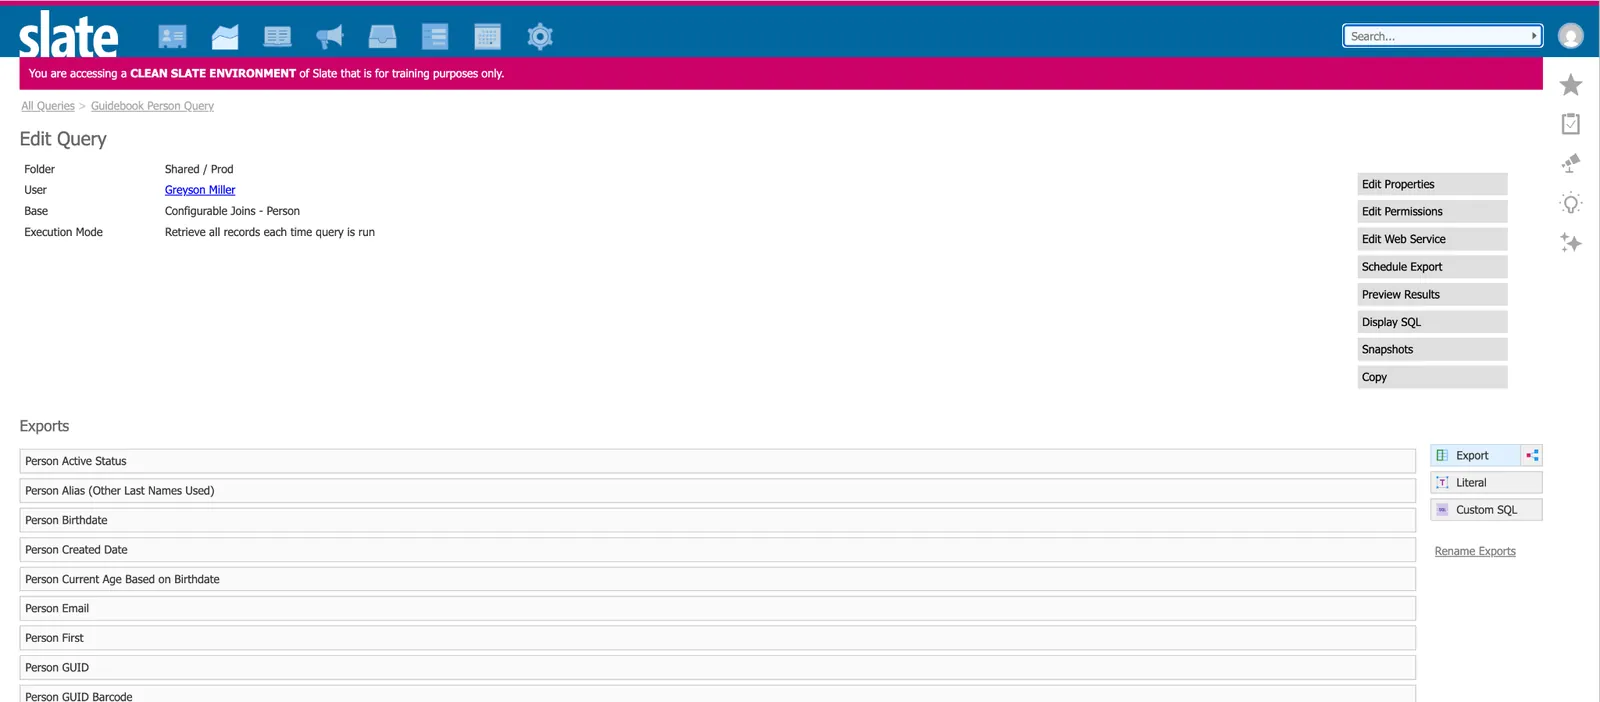
Go to Queries, select “Guidebook Person Query”, then “Edit Query”. Add the custom fields to the Export list using the “Export” button.
-
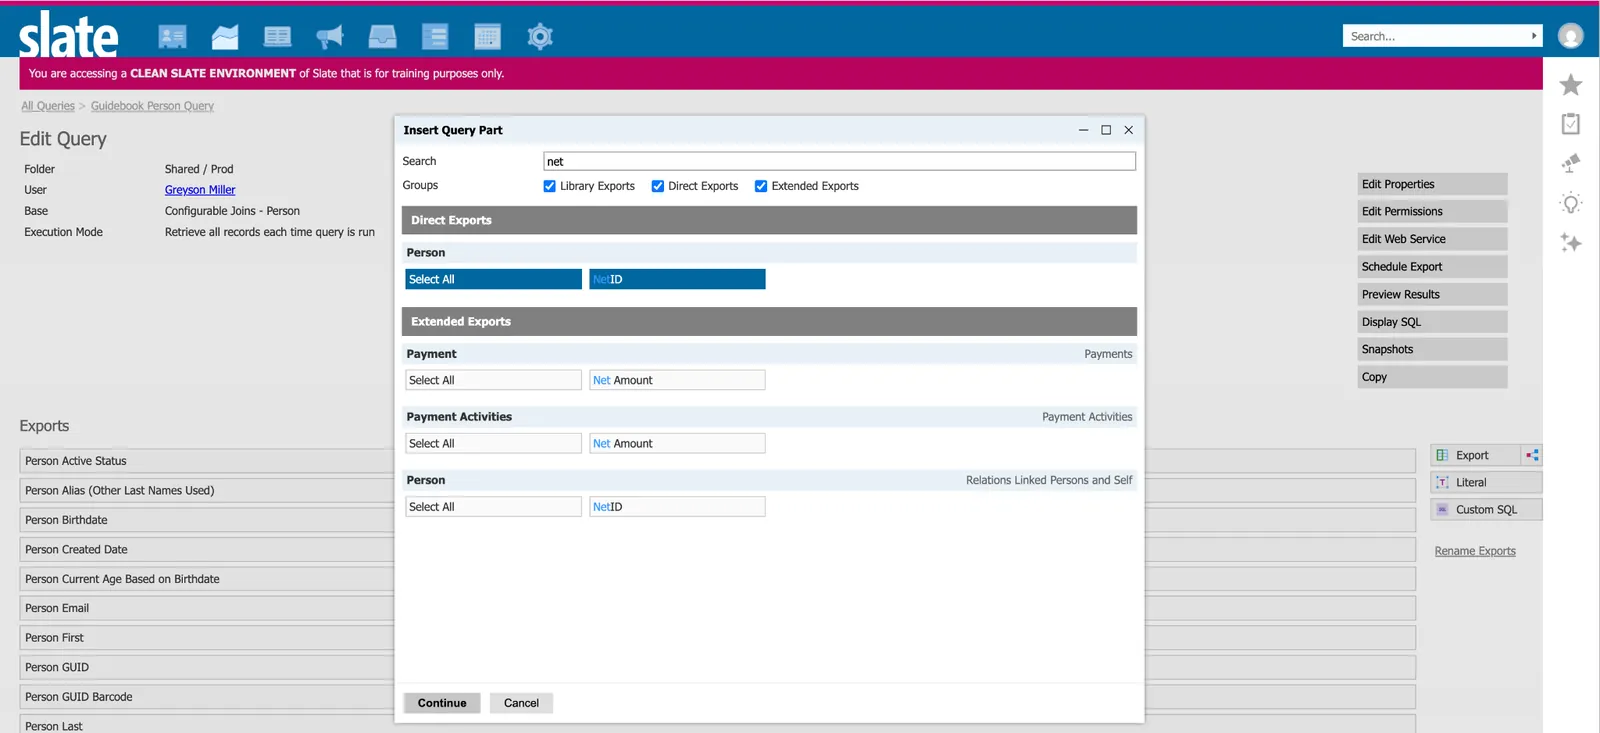
Search for each of the following and add them one by one: NetID, Major, College, OLGroup.
You can also search for and add any other custom fields you want during this step.
-
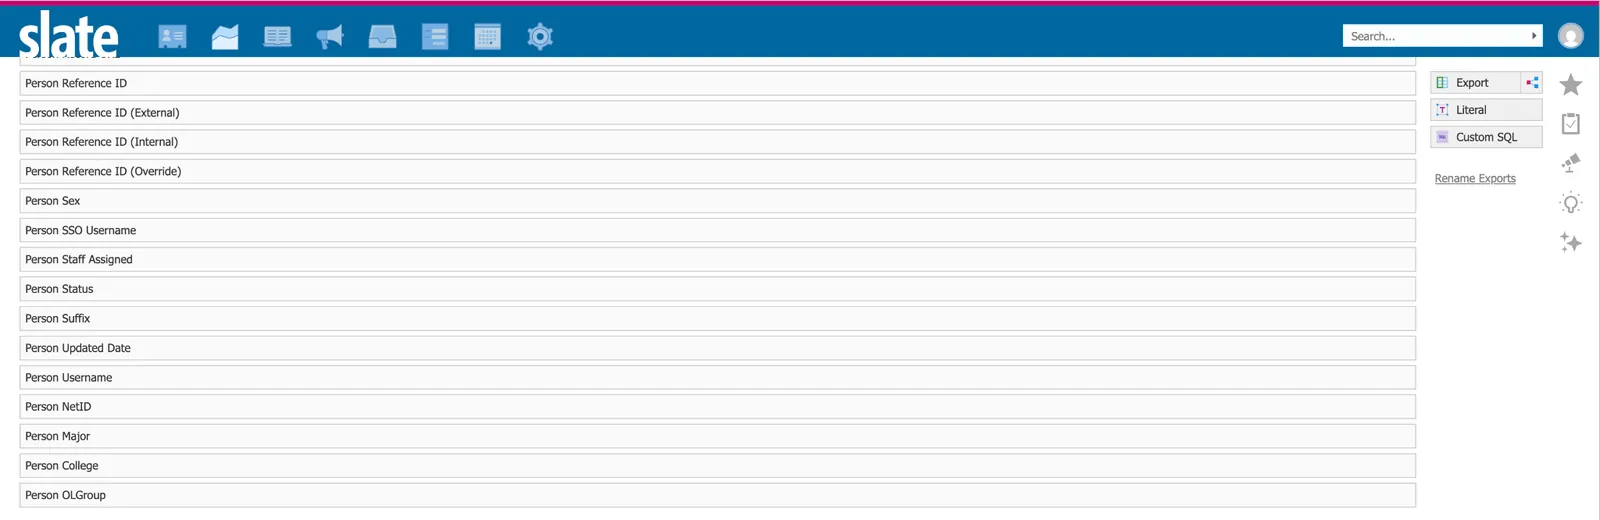
Confirm you have added (at least) all four default custom fields to the Query: NetID, Major, College and OLGroup.
If you added additional custom fields, confirm they are also in the Query.
-
Optional To let Guidebook refresh individual student information on demand, complete this step and step 10.
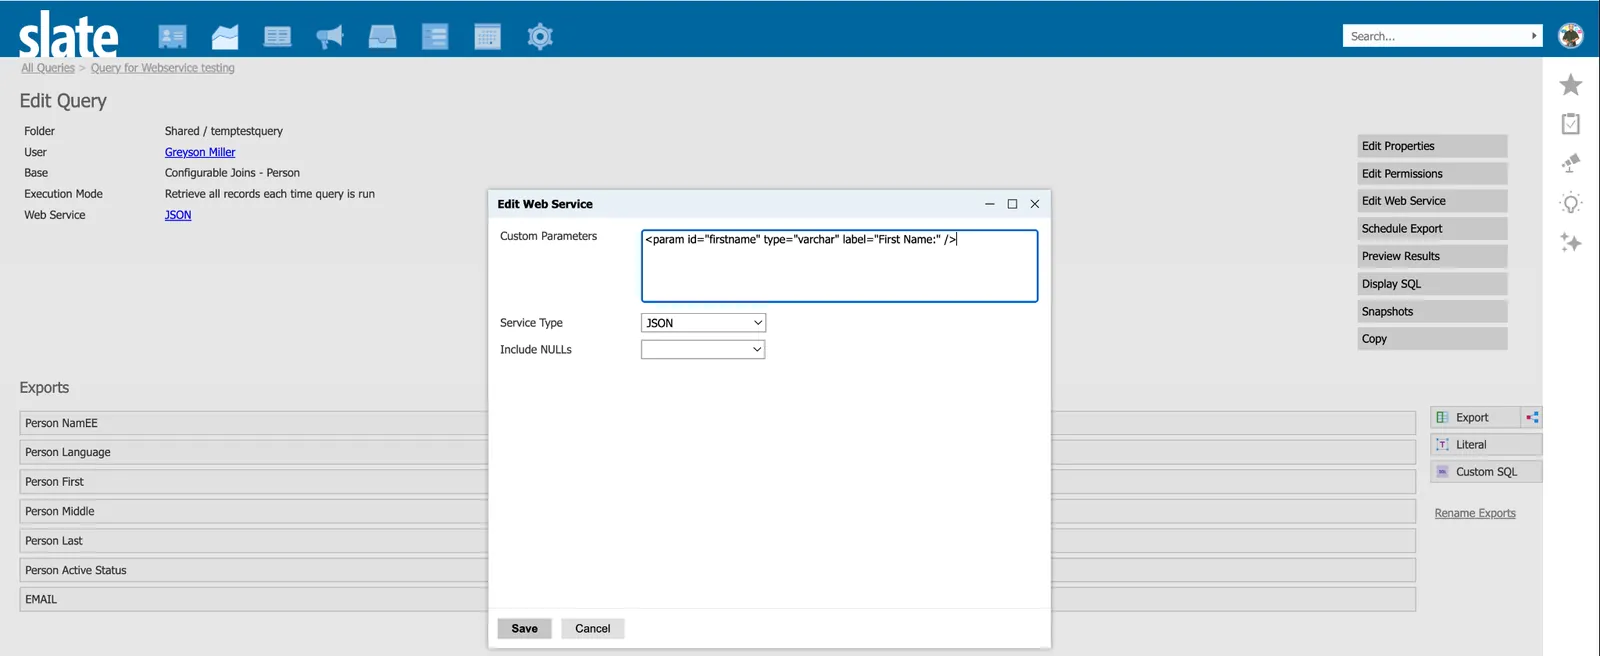
First, add the following to the “Custom Parameters” section of “Edit Web Service”:
<param id="firstname" type="varchar" label="First Name:" />Set “Service Type” to “JSON” and click Save.
-
Optional In the Filter section, select the “Custom SQL” button.
Set Status to “Active”, Name it “Individual Filter”, and enter the following SQL in the “SQL” textbox. Then click “Save”.
[id] IN (SELECT [id] FROM [person] WHERE @firstname IS NULL OR @firstname = '' OR [first] = @firstname)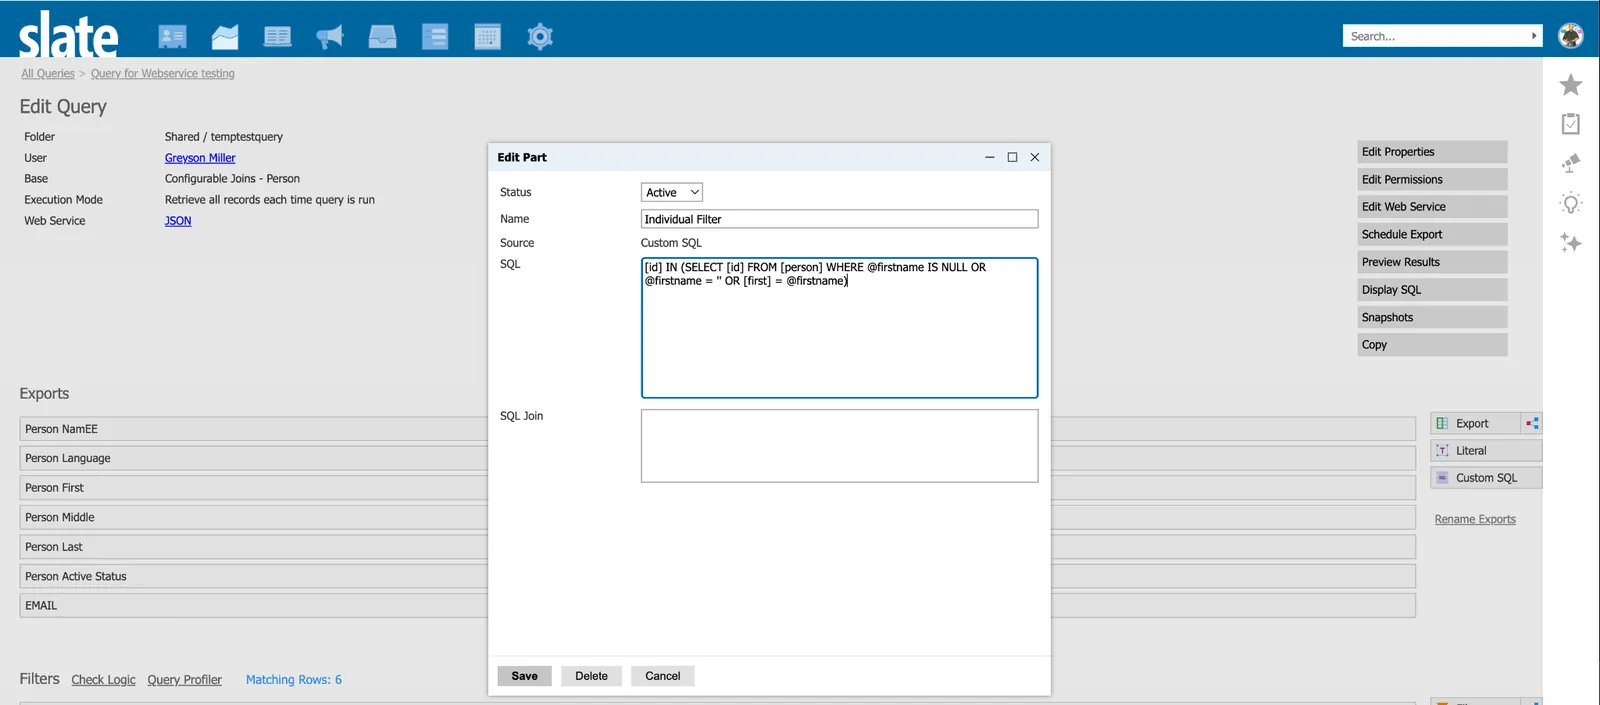
-
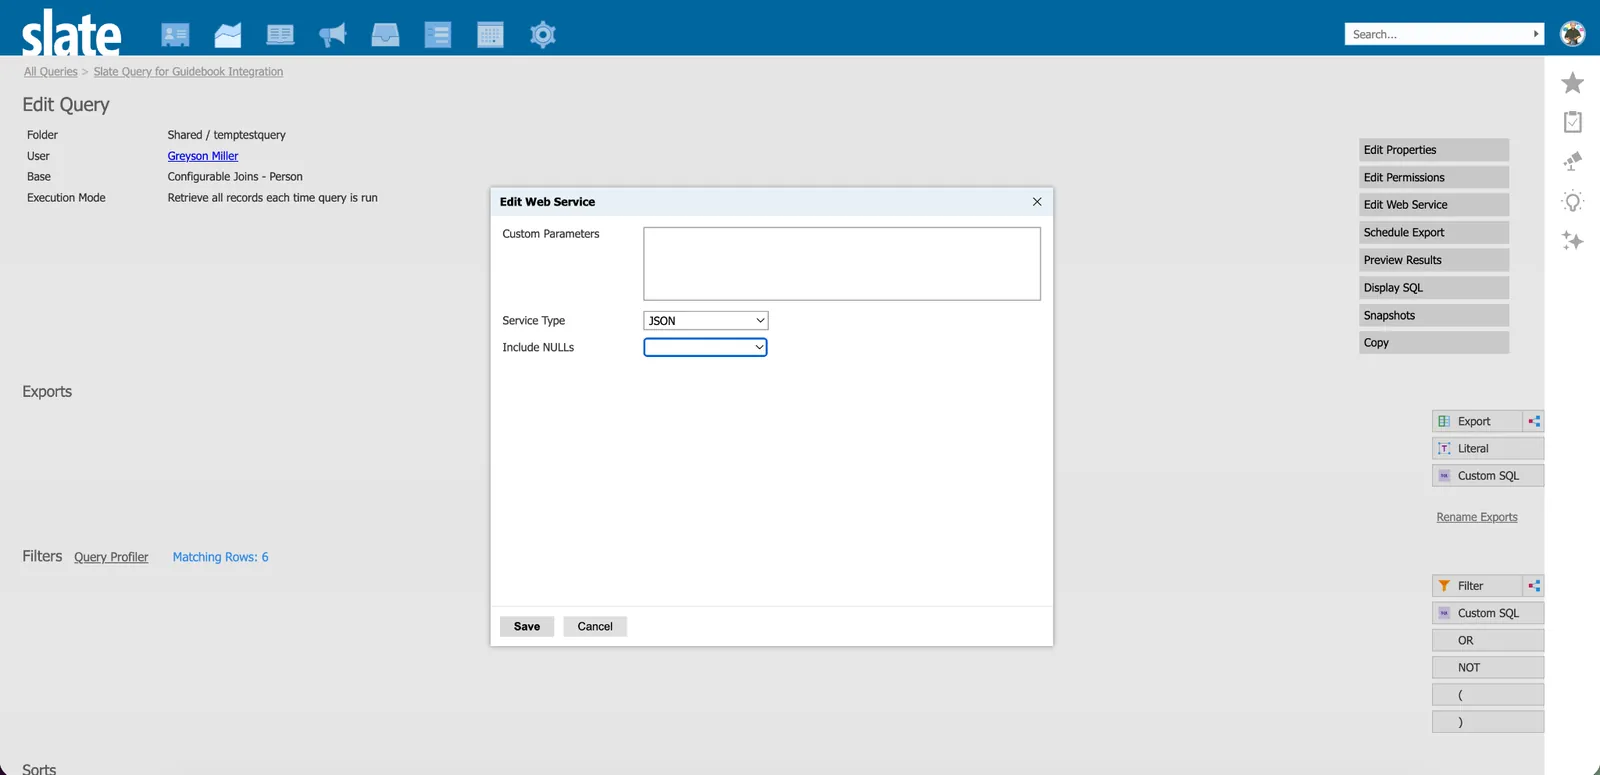
If you skipped step 9, set the query’s output to a web service (JSON).
Select “Edit Web Service” from the right-side menu, and under “Service Type”, choose “JSON”. If you completed step 9, move on to the next step.
-
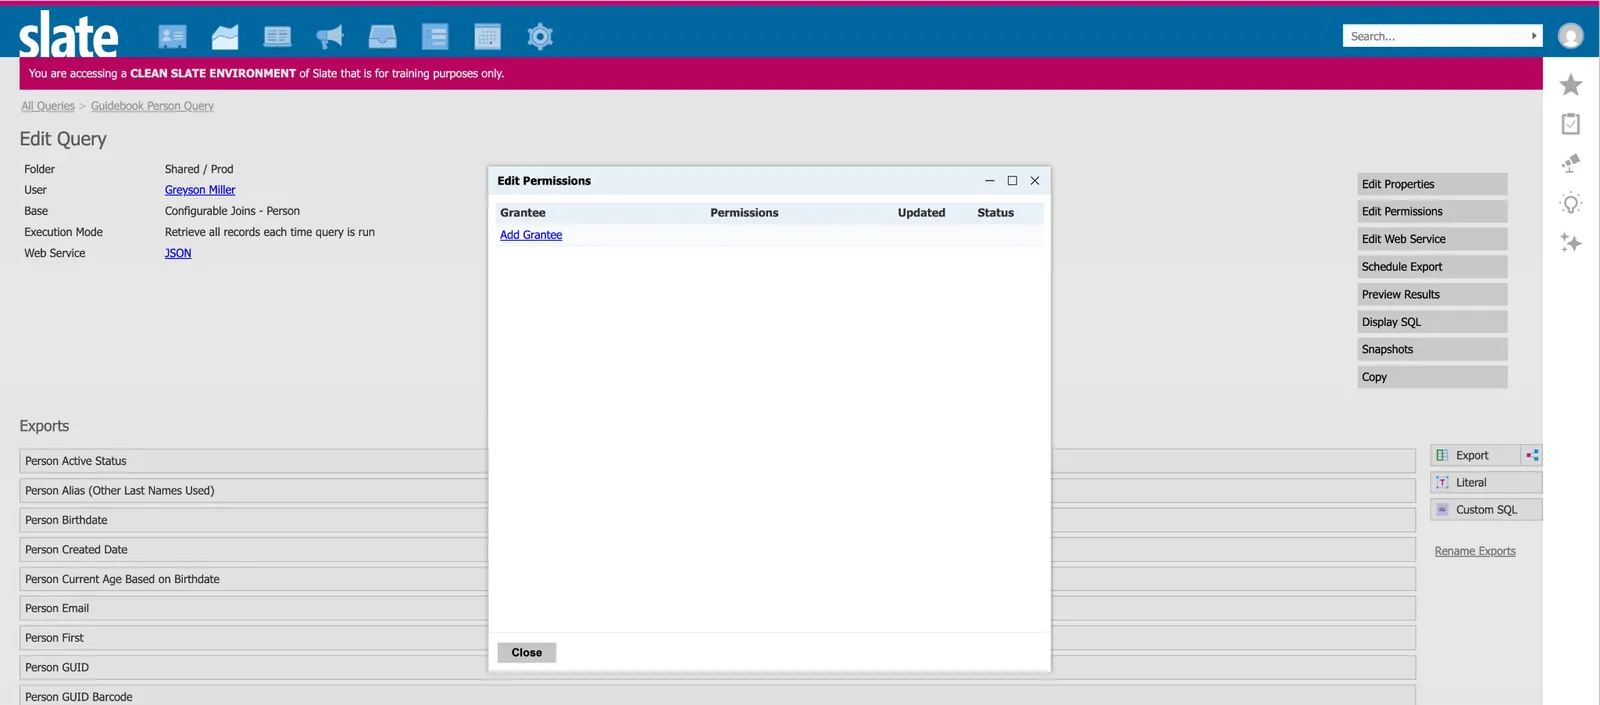
From the Edit Query screen, choose “Edit Permissions” from the right-side menu, and add a new grantee.
-
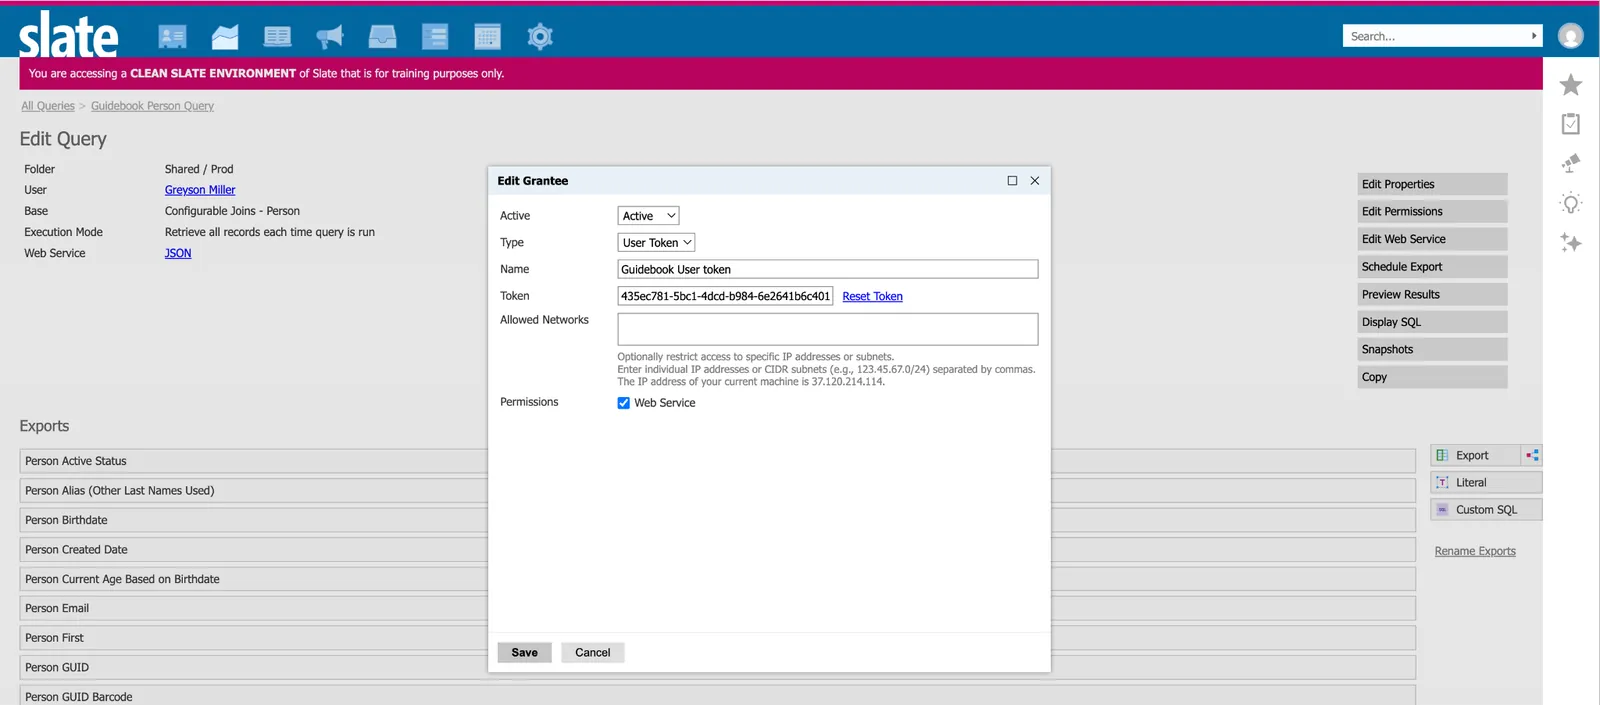
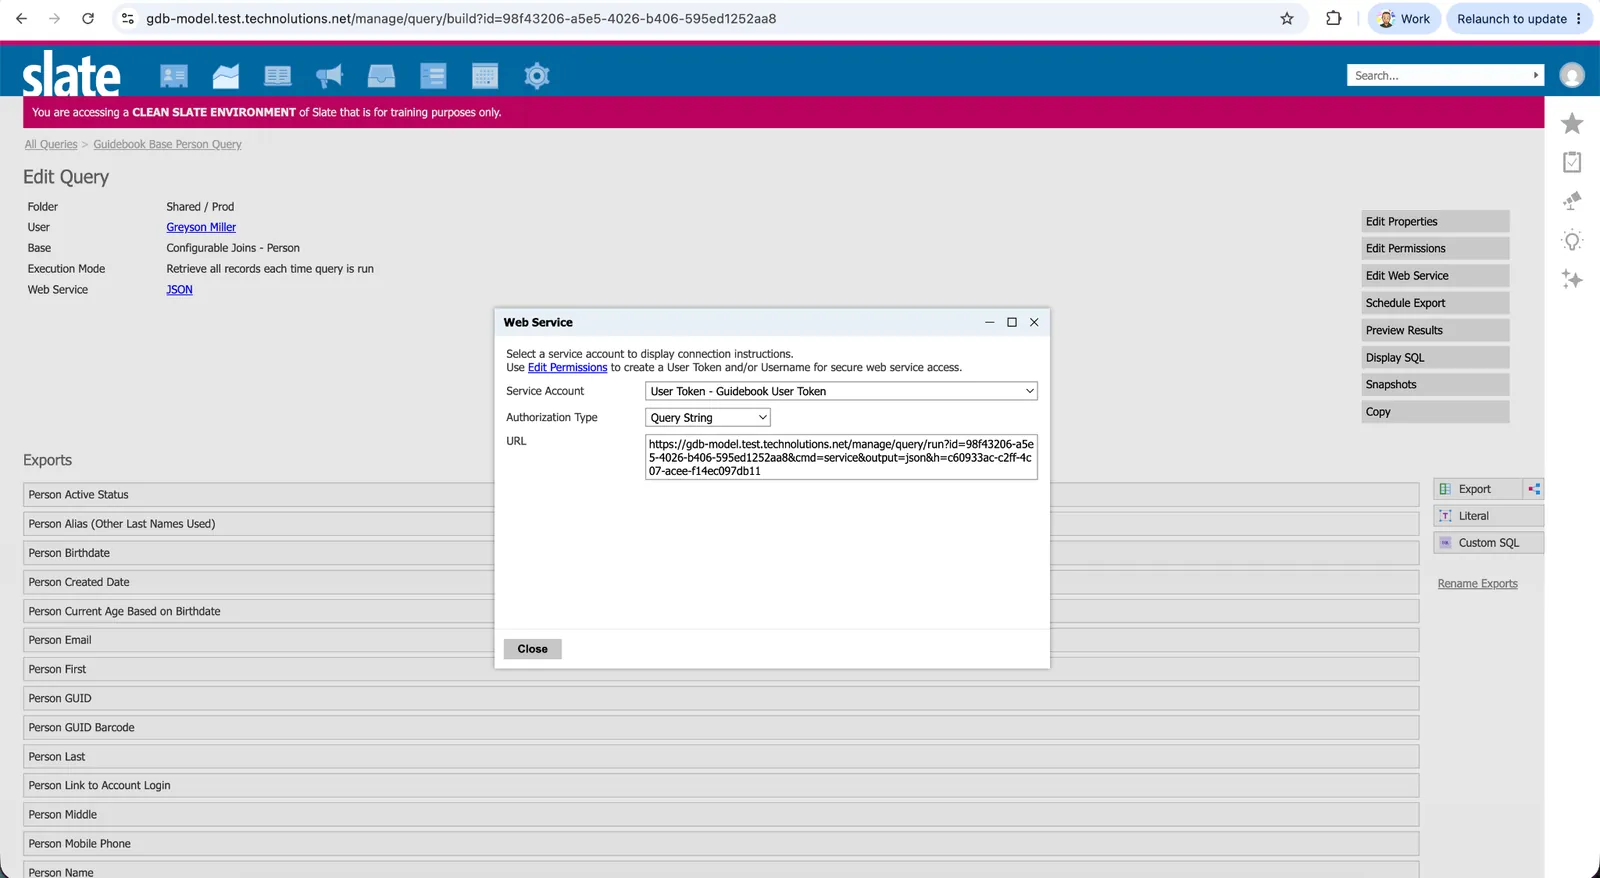
Set the Type to “User Token”, name the grantee “Guidebook User Token”, check “Web Service” under Permissions, then Save.
This is the service account that authorizes access to the web service.
-
Return to the “JSON” link on the Query, choose the grantee you just created, and copy the generated web service URL.
It includes a security key as the
h=parameter at the end, for example:https://slate.youruniversity.edu/manage/query/run?id=XXXX&h=YYYYYYYYCopy and save this full URL. You’ll paste it into Builder in the next section.
Your Builder organization admin Connects the web service, sets the sync cadence and profile labels, saves
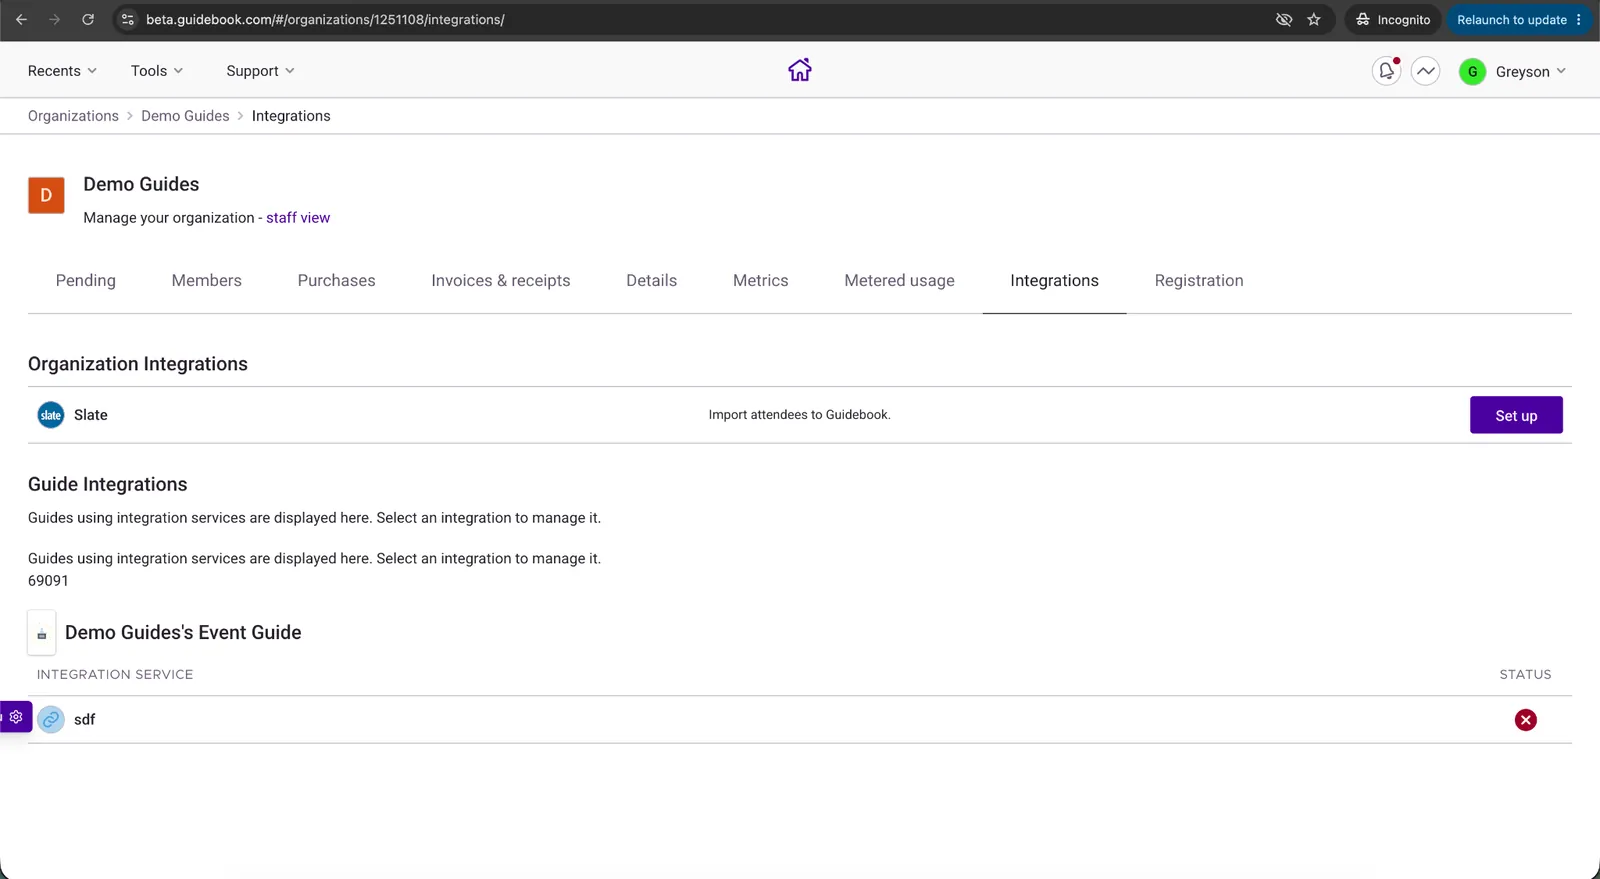
With your Slate web service URL ready, log in to Builder and open your Organization’s Integrations tab.
-
Find the Slate integration in your Organization’s “Integrations” tab and click Set up.
-
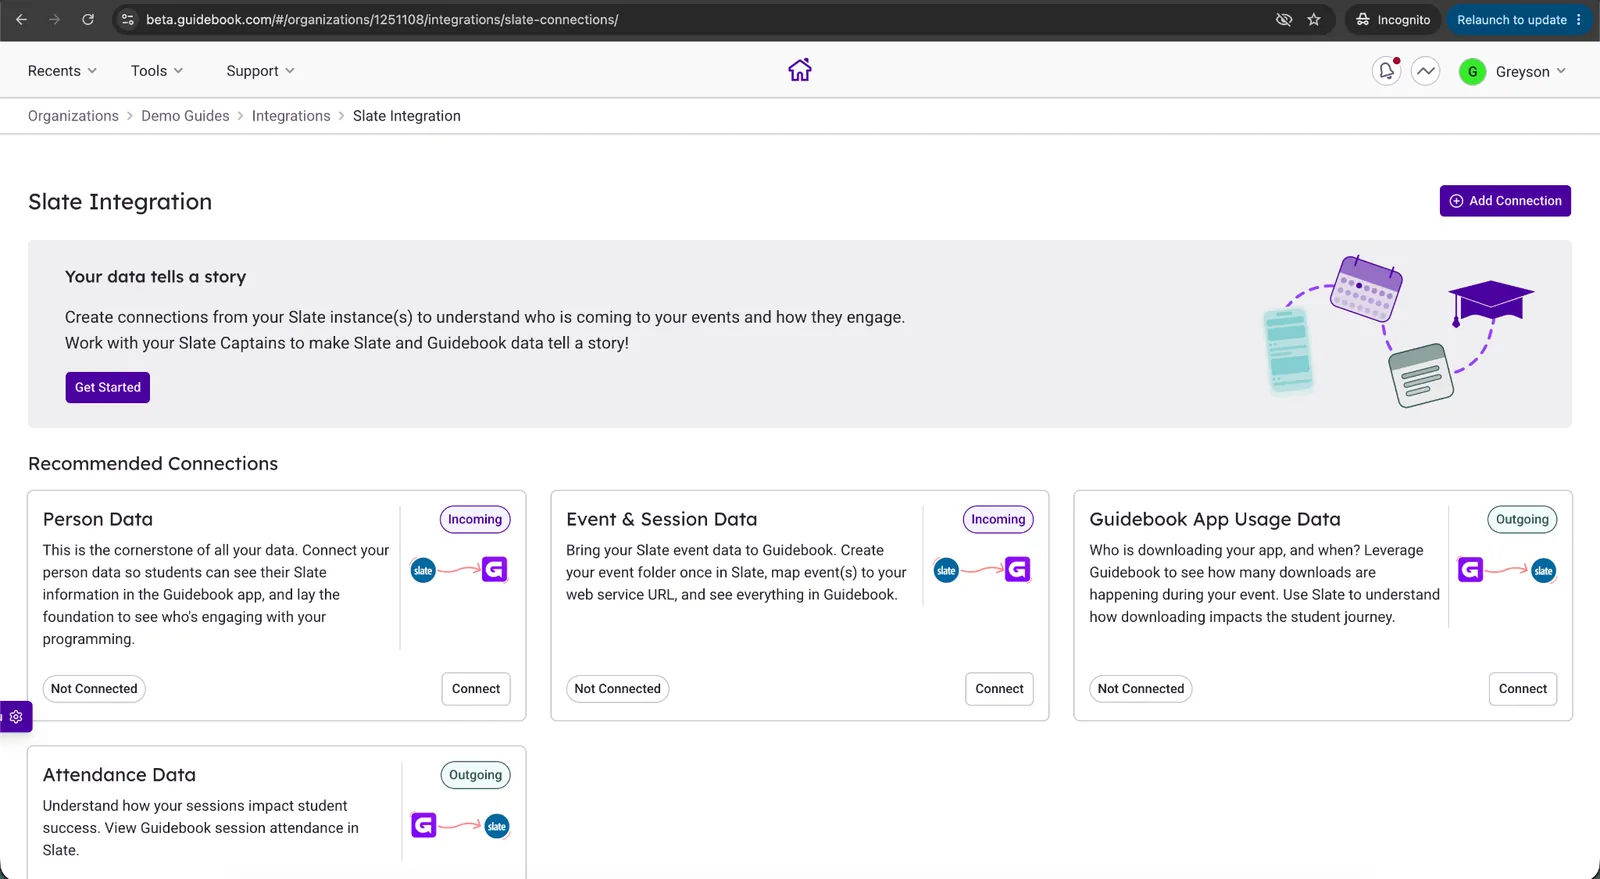
Choose the Person Data (Incoming) section, and click “Connect”.
-
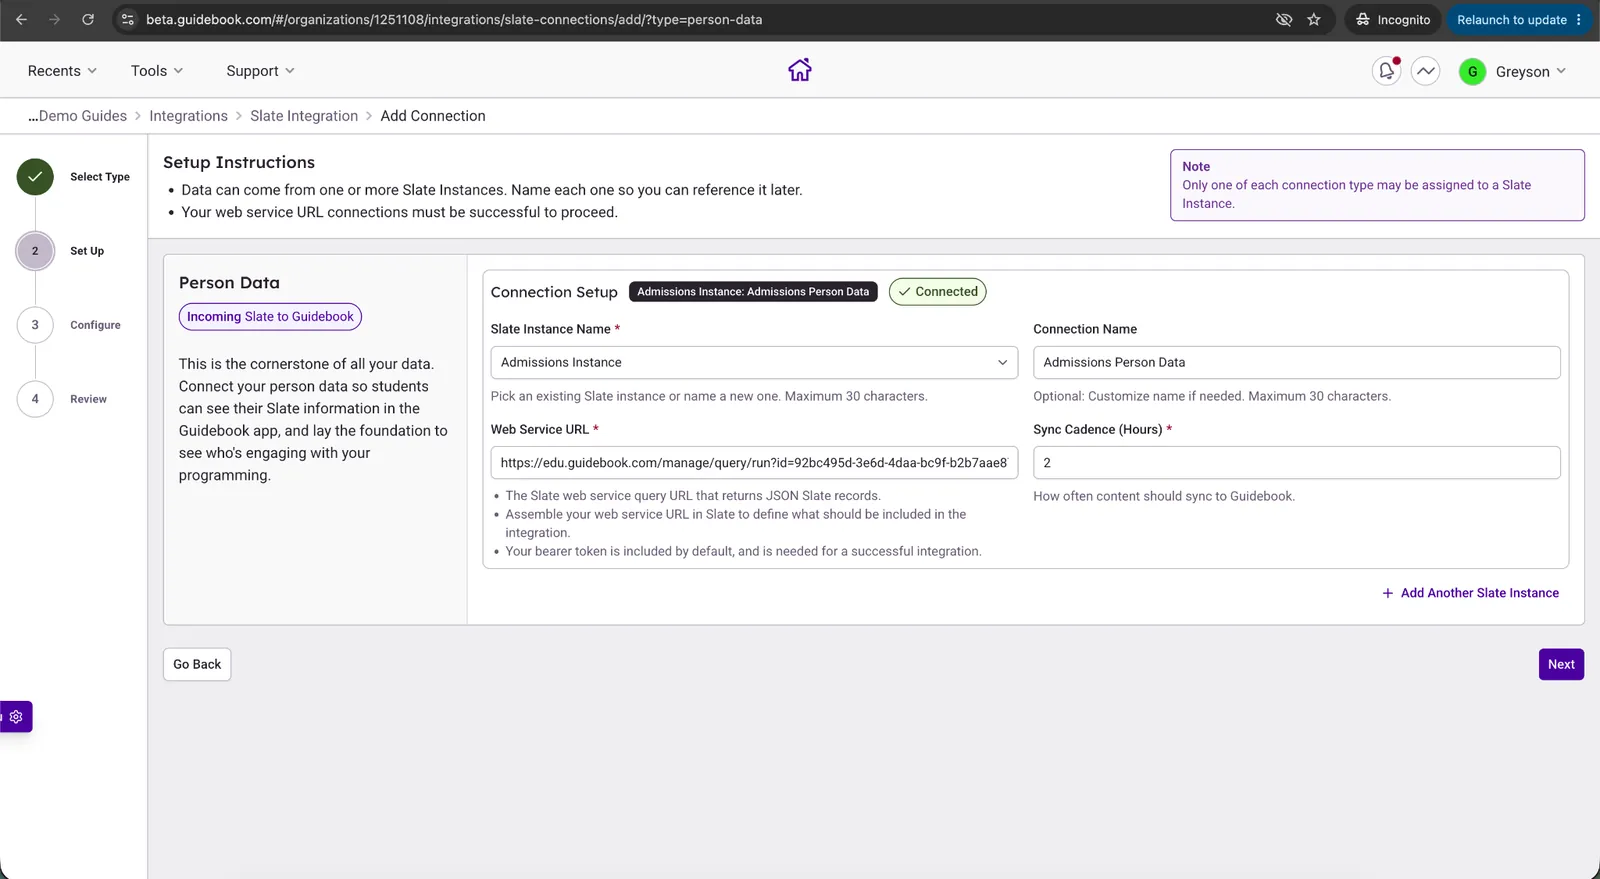
Enter an instance name and connection name, paste in your web service URL, and select a sync cadence (every 2 hours by default).
The connection is tested automatically once the URL is pasted, and a “Connected” pill shows when it succeeds. If you have more than one Slate instance, you can add another Person Data section for each. When every connection you want is set up, click “Next”.
-
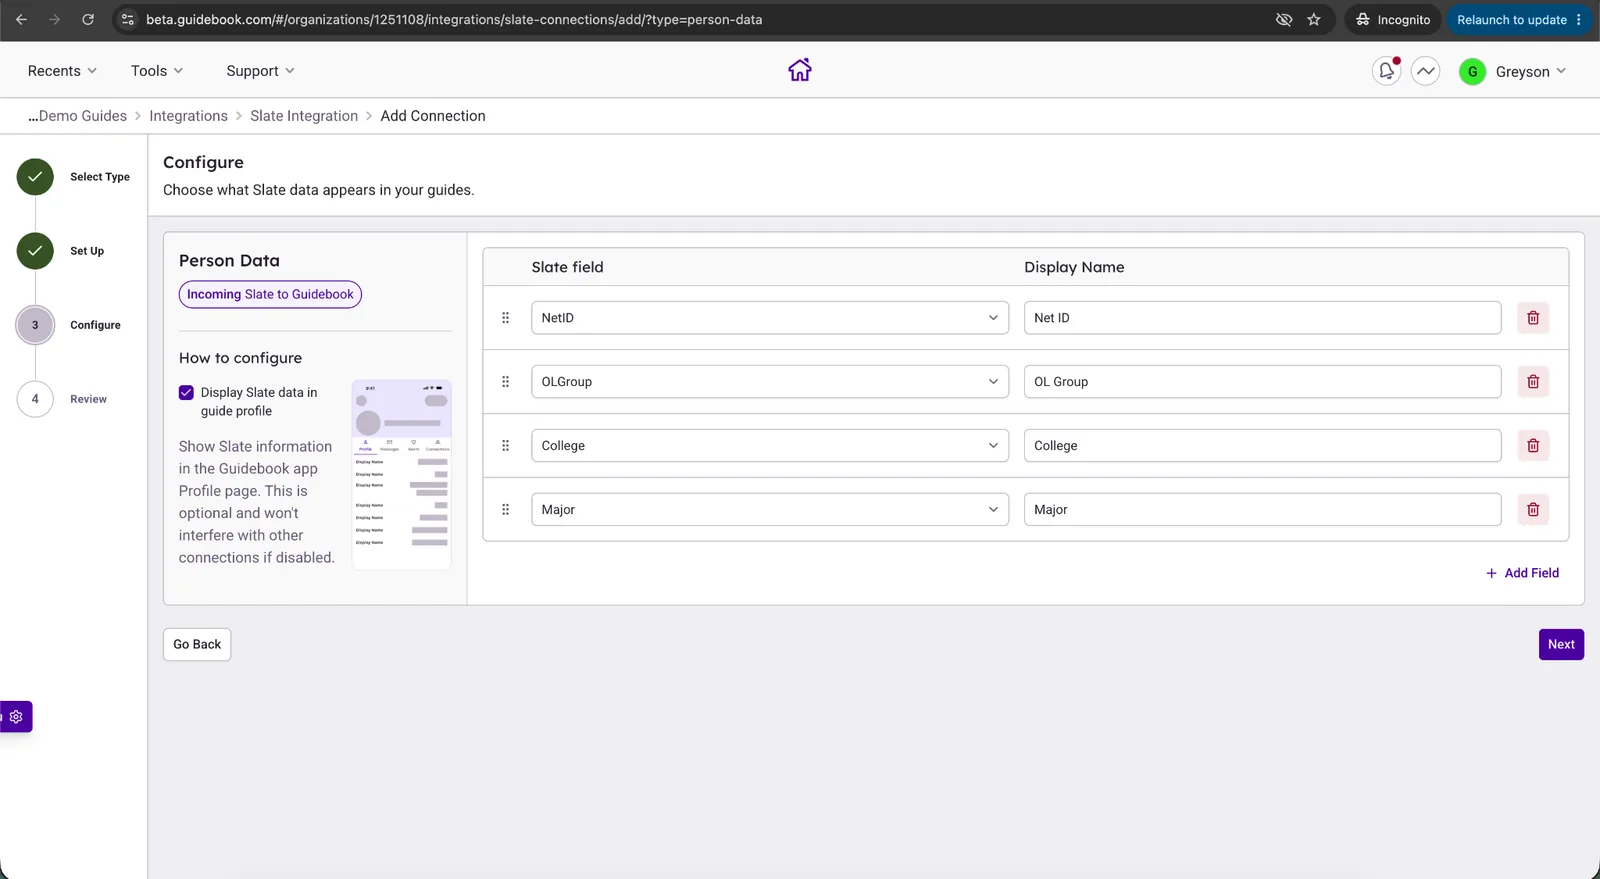
Define the display name of any fields you want shown on the User Profile page in the app.
Names are populated with the English defaults. To hide Slate information on the profile page entirely, untick “Display Slate data in guide profile”. When ready, click “Next”.
-
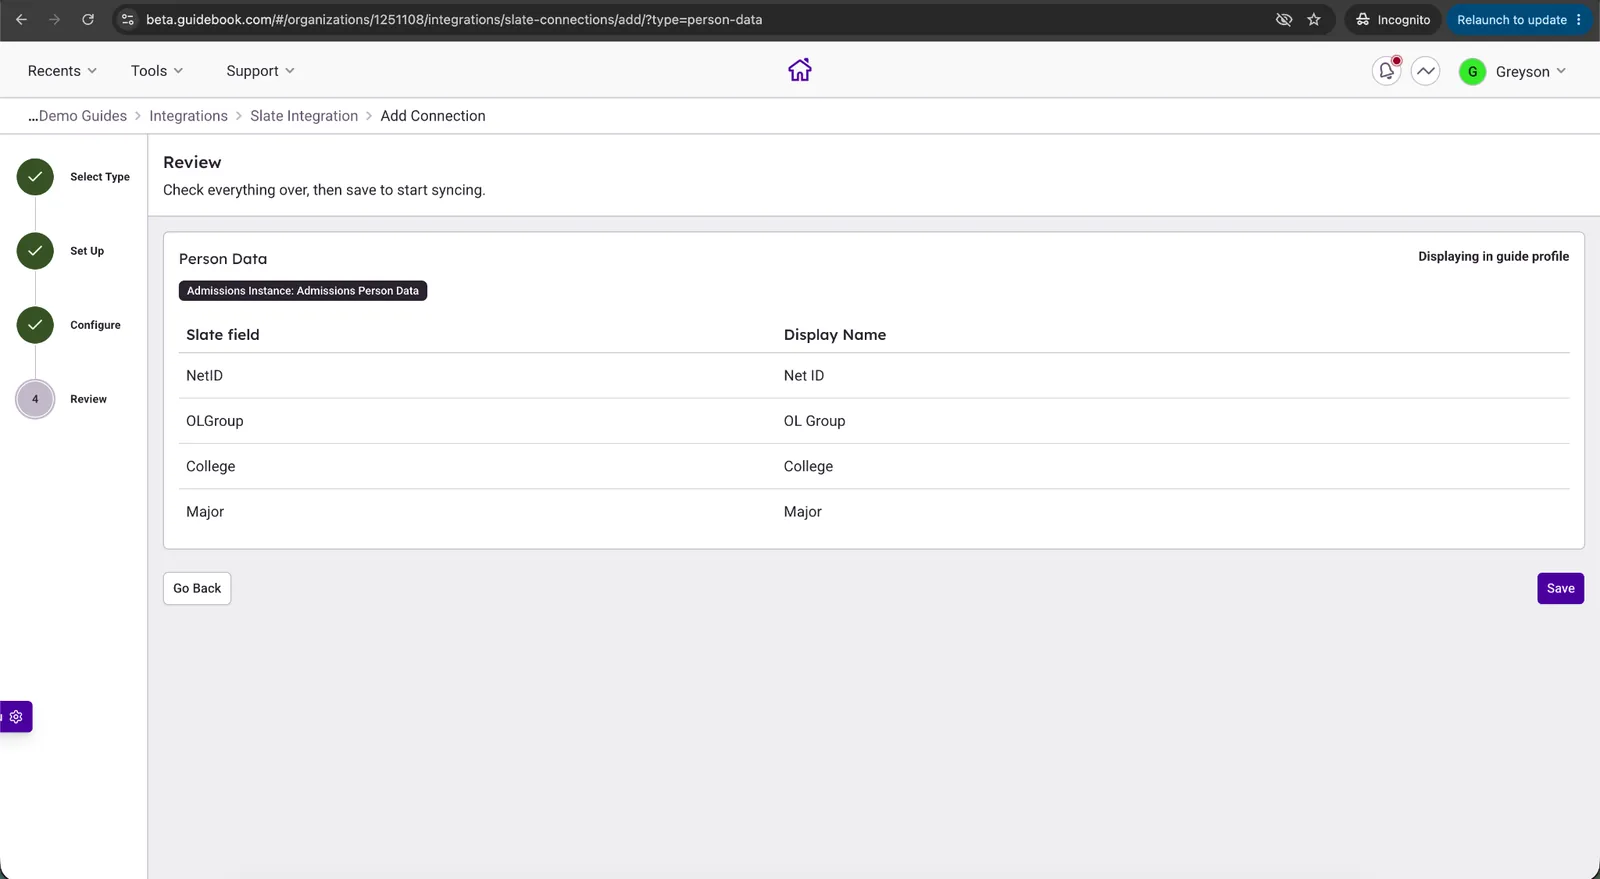
Review your setup. Click Save to enable the integration, or go back to fix any items.
-
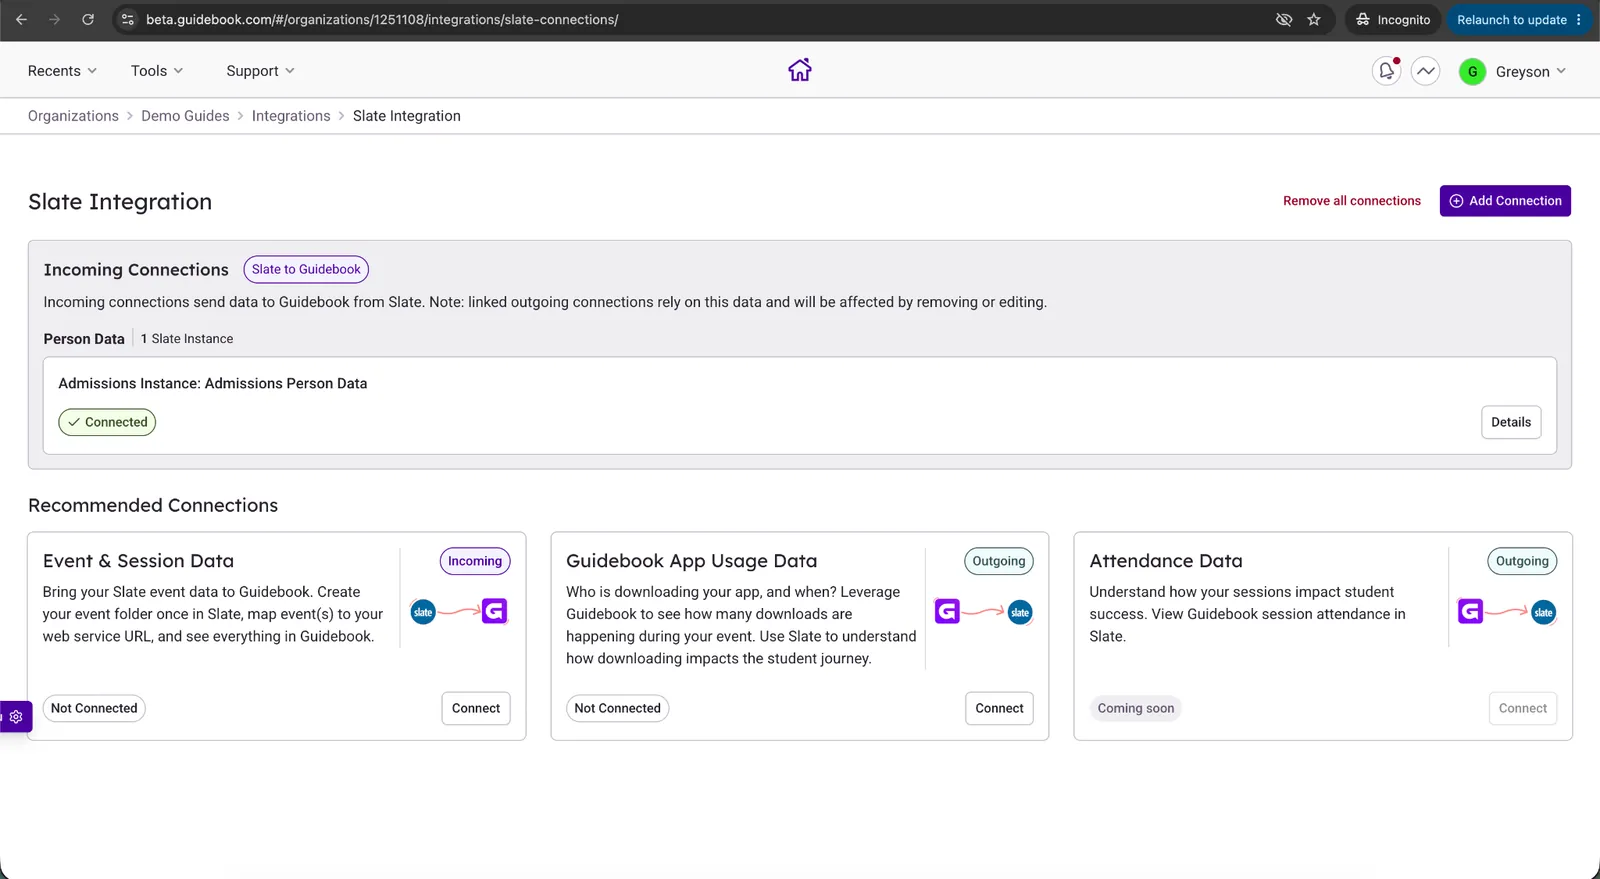
As soon as the integration is saved, Guidebook runs a first sync automatically.
A successful connection looks like this:
After it's connected
Change field labels, credentials or sync timing, or pause the connection, all from Builder.
Your data rules stay in place.
Slate stays the source of truth, and students decide whether their app activity is shared.
Opt-in only
App activity is sent only for logged-in students with a Slate record who said yes to the guide's privacy consent. No answer counts as no.
Rechecked every run
If a student withdraws consent, sending stops from that point on.
Protected guides stay out
Archived guides and guides with strict privacy turned on are never sent.
Slate owns the record
Student names and imported events are managed in Slate and stay in sync automatically.